Friday, February 14, 2014

Guest Room Reveal with DIY Board & Batten

After taking a week off work to do some serious DIY, the guest room is finally the cozy and welcoming retreat that I have been hoping for! The biggest change of all in this room was getting rid of the dark brown paint and adding a simple Board & Batten treatment with a picture ledge.  


After surfing Pinterest for inspiration, and finding several awesome examples and "how-to's" on Board & Batten, I decided to give it a try. Let's just say, I had no idea what I was really getting into! This was definitely one of the most challenging projects I have taken on, but it was completely do-able and well worth the effort!  

Any board and batten treatment will require some pretty serious planning. But don't let that overwhelm - just grab your pen and paper, measuring tape and calculator, and get started. I drew out all four walls in the room with the doors and window openings, and took the measurements for each. After you have that, it's just a matter of doing the math.


I used pre-primed MDF boards that are 3.5 inches wide, and decided to space them 13 inches apart. Most other examples I found had spacing between 12-14 inches, so you just have to play around with the spacing until it fits your specific room. 

By sketching out every board on my drawing, I was able to make sure the boards would sit on the wall in an appropriate place - and avoid making too many cuts around windows, doors, switches, or outlets.  

If you run into a tricky spot, go ahead and adjust the spacing slightly to accommodate. In the end, as long as you keep things symmetrical, the spacing differences won't be noticeable.  Just be sure to have a plan!


Once I had all my boards figured out, I wrote out a shopping list and headed to Lowe's where I had them cut all the boards for me. I had A LOT of cuts to make, so it helped to be organized and REALLY nice!!  

While we were there, we also picked up the basic supplies that we would need - wood glue, a basic miter saw, and a nail gun. The nail gun was a splurge, but totally necessary and worth the investment. I've already got a few other projects in mind for it!  The miter saw was so that we could cut the small decorative molding on our own, and it also came in handy for a few spots where the measurements weren't quite right.

Oh, and I should mention that we painted the walls before we started, using Benjamin Moore Pale Oak - one of my favorite colors. I've used this color in the main living area of my house too...  LOVE IT.

Ok, now for the fun part, putting the boards up....

Step 1: Put up the top board first, getting it as straight as possible with a level and some helping hands. This was probably the hardest part because everything will be based off this first board. With an old house like mine, the floors and ceilings are always a little crooked, so I couldn't totally rely on a level.... had to "eyeball" it as well.  


Step 2: Add the vertical boards. Now that you have the top board installed, you can use that as your level for these, so you only need to worry about getting the right spacing. This part goes by pretty fast!

Step 3: Add the bottom board. Not everyone will need this bottom board, it just depends on the type of floor moldings you have. For my house, I have these huge beautiful floor moldings that are original to the house, so I didn't want to mess with them at all. Instead, I simply added a board to the bottom of my vertical boards, keeping it a couple inches above the floor molding. Once everything is painted white, it all makes sense.


Step 4: The Picture Ledge. For this, you simply place a 2-inch board at the top, perpendicularly (is that really a word?!). Then choose a small decorative molding to go underneath the 2-inch board, acting as a support. I just laid it out on the floor at Lowe's and tried different decorative moldings until I found my favorite. To complete the picture ledge, add one final piece of decorative molding on the very top, which adds another pretty detail and functions as a way to keep pictures or other decor from sliding off.


Once all the wood pieces are up, then it's time to go around and fill in all the seams and gaps with caulk. Caulk will be your best friend at this point, hiding all the imperfections, like your favorite concealer. Then give it a good 2 coats of trim paint (semi-gloss) and YOU ARE DONE!

So, what do you think, are you up for the challenge???


Wednesday, February 12, 2014

While Kim Was Out

I'm excited to share a really fun project that Jessica and I recently completed for our good friend, Kim. Jessica and I are obsessed with decorating, always looking for ways to reinvent our own homes, so when Kim asked for our help to give her town home a fresh new look, we jumped at the idea!  She gave us a budget of $2,000 to decorate her entire first floor, which includes the living area, dining area, and kitchen. On the weekend of the redesign, we kicked Kim out of her house so that she would be totally surprised when she came home.


This was our first experience decorating for someone else, so it was a huge challenge to try and make sure all the design decisions reflected Kim's style.  In the end, we think it really reflects Kim's sweet, outgoing, positive personality! Here is the Before and After for the Living Room.  Pretty dramatic change, right?


Kim asked us to keep her main furniture, which was all fairly neutral, so our goal was to add a bunch of bright, more feminine colors and patterns.  The curtains and pillows alone made a HUGE change to the feeling in the room.  We purchased the navy chevron curtains from West Elm and the pillows came from Etsy, Pottery Barn, Marshall's, and Ikea.


The other major change in the Living Room is the rug and coffee table.  The brown geometric rug from Ikea really helped ground the entire area.  Then we painted Kim's coffee table in a creamy white to help brighten up the room and highlight the pretty details of the table.  For a budget-friendly way to dress up the coffee table, we painted some mason jars that Jessica had saved (jars from spaghetti sauce!), then added a little greenery from a bush right outside of Kim's house.


Finally, the art wall gave us an opportunity to bring in more color, and also to add a personal touch with an antique letter "K" and some photos from Kim's travels.  


Adding a mix of vintage items, books, and some trinkets that Kim has collected during her international travels helped add even more character to the space.  I especially love the small antique crate that we found to store and hide the remotes....


On the other side of the Living Area, we had to address the entertainment center.  Kim had a nice big flat screen TV, but we needed to solve the problem of storage and improve the style.  So we gave the "bachelor pad" TV stand the boot and replaced it with a dresser from Craig's List.  

In order to make the dresser functional as a TV stand, we took the top row of drawers out, inserted small wood planks to make shelves, and then added holes in the back for the cords.  Pretty easy actually!!

We also added a pop of color with those teal vases, a little tray to throw your keys when you walk in the door, and some black & white photos to fill out the wall above the TV.  


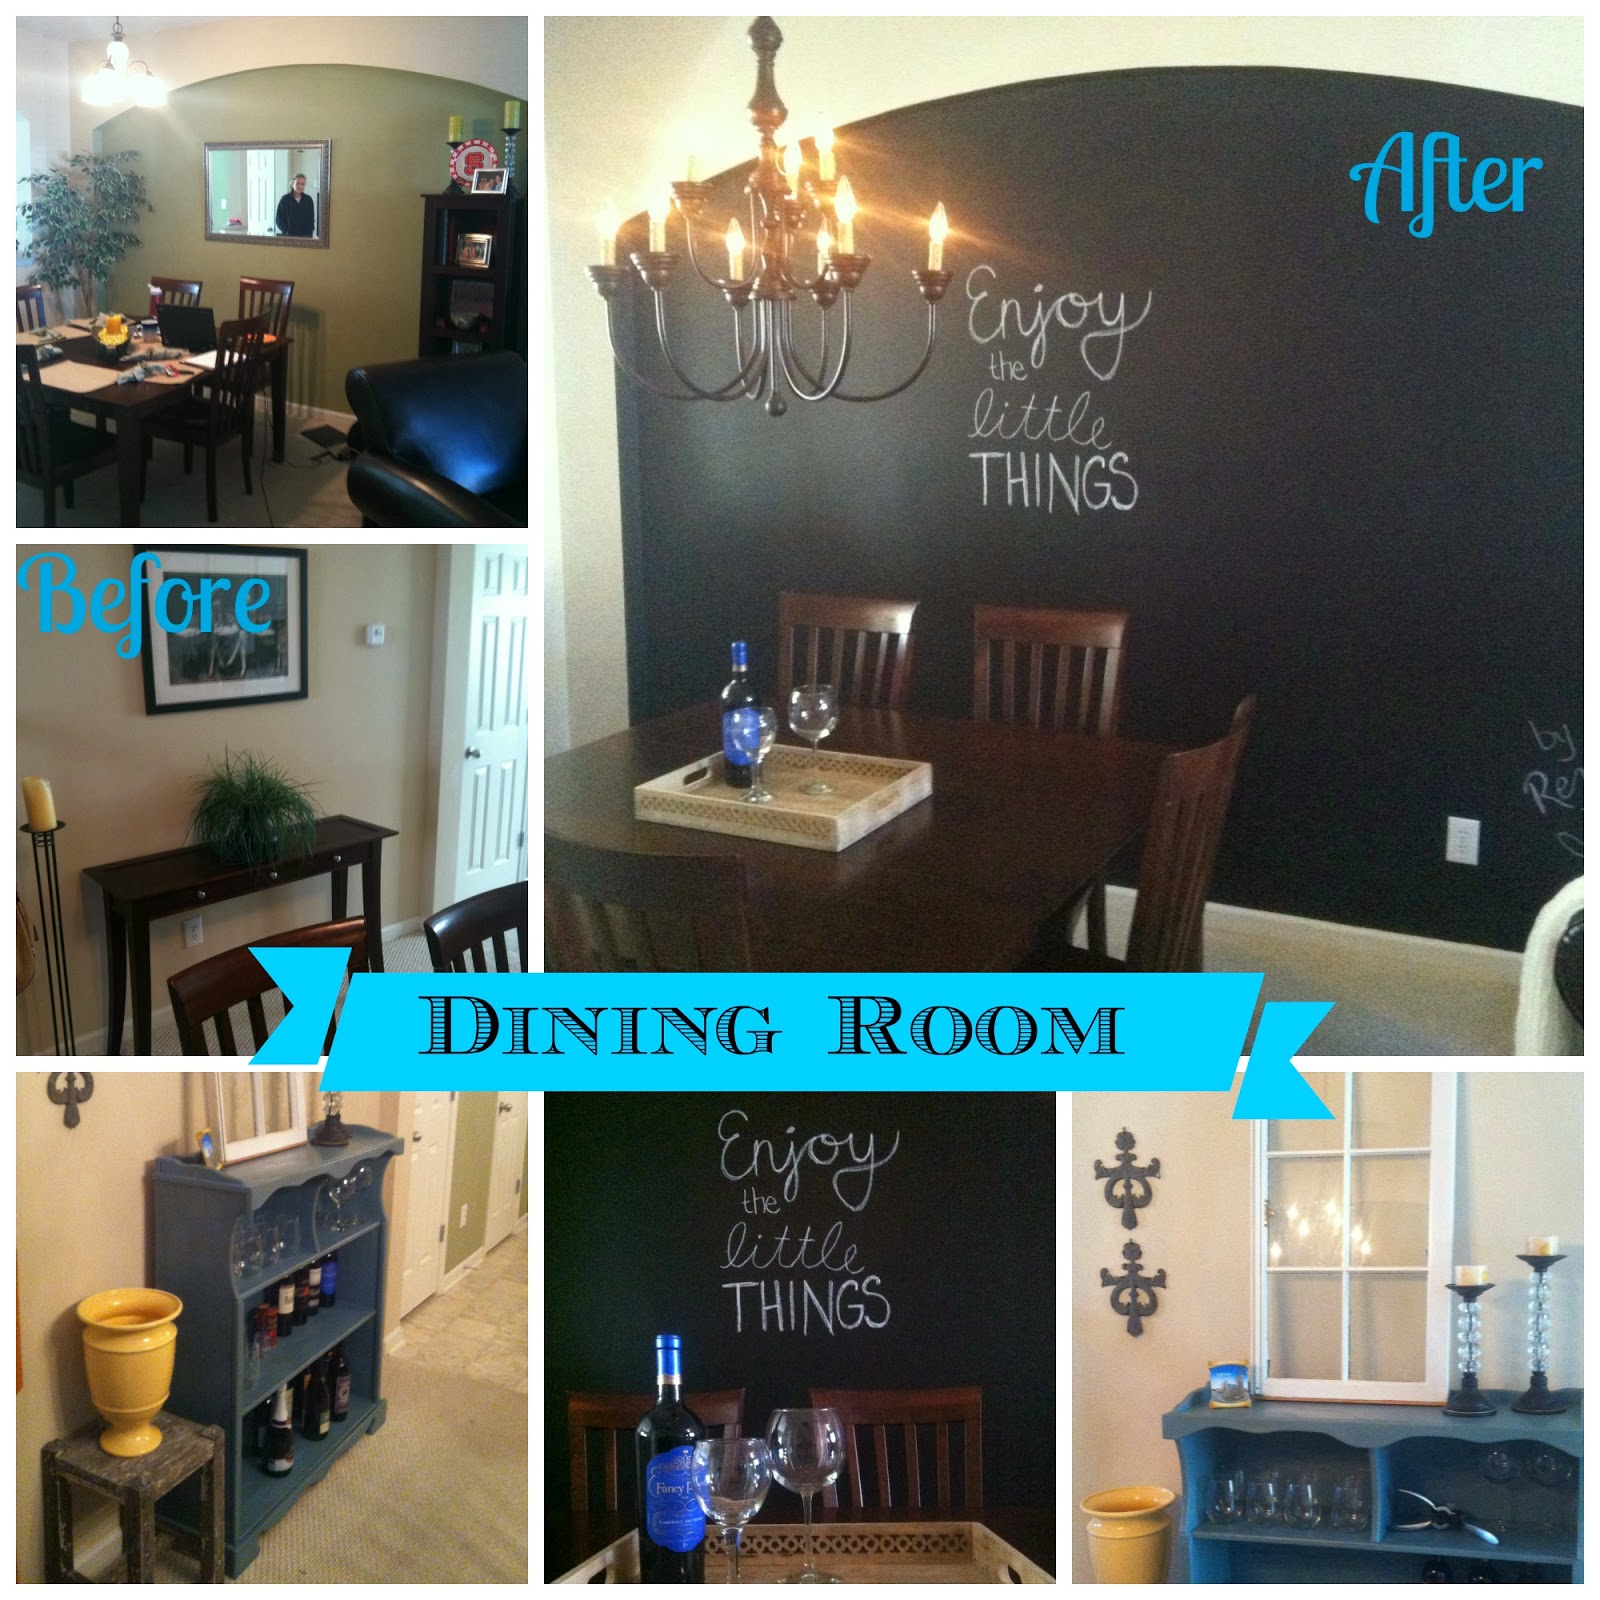
Ok, on to the Dining Room.  We kept this room pretty simple, making just a couple changes that made a huge impact.  The standard builders lighting was replaced with a fabulous oil-rubbed bronze chandelier that Jessica found for only $30 at a local thrift store.  It really looks like something out of Pottery Barn that would cost hundreds of dollars!

We conquered the challenge of that arched 3-inch nook by painting it with chalkboard paint.  This was a really fun and low cost way to highlight the architectural feature and make it functional.  Now Kim can put up her menu for dinner parties or use it for a game of Pictionary if she wants!!

In order to add some character to this space, we also decided to replace the simple wood side table with an old bookshelf that we found at a local antique store.  Jessica painted it with a soft blue color and we used it as a place to store wine bottles and glasses.  An old window and stool added even more character and helped fill the space out, without spending too much money.


And finally, the Kitchen!  Adding an island, new lighting, and shelving really gave this kitchen some charm and functionality.  We found the island online and the chandelier is just a smaller version of the one in the dining room.  This was another great find by Jessica at the same thrift store for only $30!


Another big change to the kitchen was the addition of the chevron curtains.  This really helped tie together the entire space and warm things up.  We also continued the chalkboard theme by painting the backsplash with chalkboard paint.  And finally, some simple de-cluttering and a few decorative touches like an antique scale helped finish off the look.


While Kim Was Out, we completely transformed her place and luckily I think she really likes it!  I will leave you with the big reveal video so you can enjoy her excitement almost as much as we did....


The End


Saturday, March 10, 2012

Susan's Baby Shower - Oh Baby x2!!!


Last November, I was lucky enough to be in charge of decorating for my good friend Susan's baby shower.  She just had her twin girls recently, so it reminded me that I never posted about the shower.  Susan really wanted to do an alphabet wall in her nursery, and being the diy-gal that she is, she came up with the great idea to have the girls at the shower help paint/decorate the letters for her alphabet wall.  This then became the inspiration for all the decorating... check it out!


Sunday, June 12, 2011

Recovered Ottomans and A Roadside Treasure

It's been a very productive weekend here at the Charlotte Cottage - thrift shopping, landscaping, rearranging furniture, and even some DIY'ing!  But the thing I am most excited about was a total surprise and super easy!  Check out this gorgeous roadside treasure I found on my way to the dog park - a rustic white iron fireplace cover!


Isn't it a huge change from this black one I had before? 


I loved the black one, don't get me wrong, it was a great buy from Target several years ago, but this white one seems to have really brightened up the entire room.  It's inspired me to lighten up things a bit and go for a more "summery" feel in the living space.   So, I'm on the hunt for some pillows and have been re-arranging furniture and accessories to get that look.  Which leads me to the next topic, the recovered ottomans.

This DIY project has given the room another fun summer touch.  I've been eyeing these little ottoman's from Target for a while now.  I love the curved crossing legs and I knew they would be super simple to recover.  So, when they went on sale, I finally broke down and ordered them - click here to find them on target.com (free shipping too!).


I had some pretty navy and white fabric with a fun coral pattern that I found on one of my Metrolina shopping sprees, so I decided to use it for the ottomans.  Other than that, all I needed was a good pair of scissors and a staple gun, and wah-lah!!!


And here's some pictures of how they fit into the room with the new furniture arrangement.  I love how this arrangement opens up the view to the fireplace and built-ins.  Plus it turned my 4-seater living room into a comfortable 6-seater!


PS - The curtains aren't installed yet.  I have them hanging over the shutters for now to see if I like them.  Are you digging it or does it feel like just too much blue & white pattern?  Hmmmm....

Thursday, May 5, 2011

Old Shutter Becomes a Coat Rack

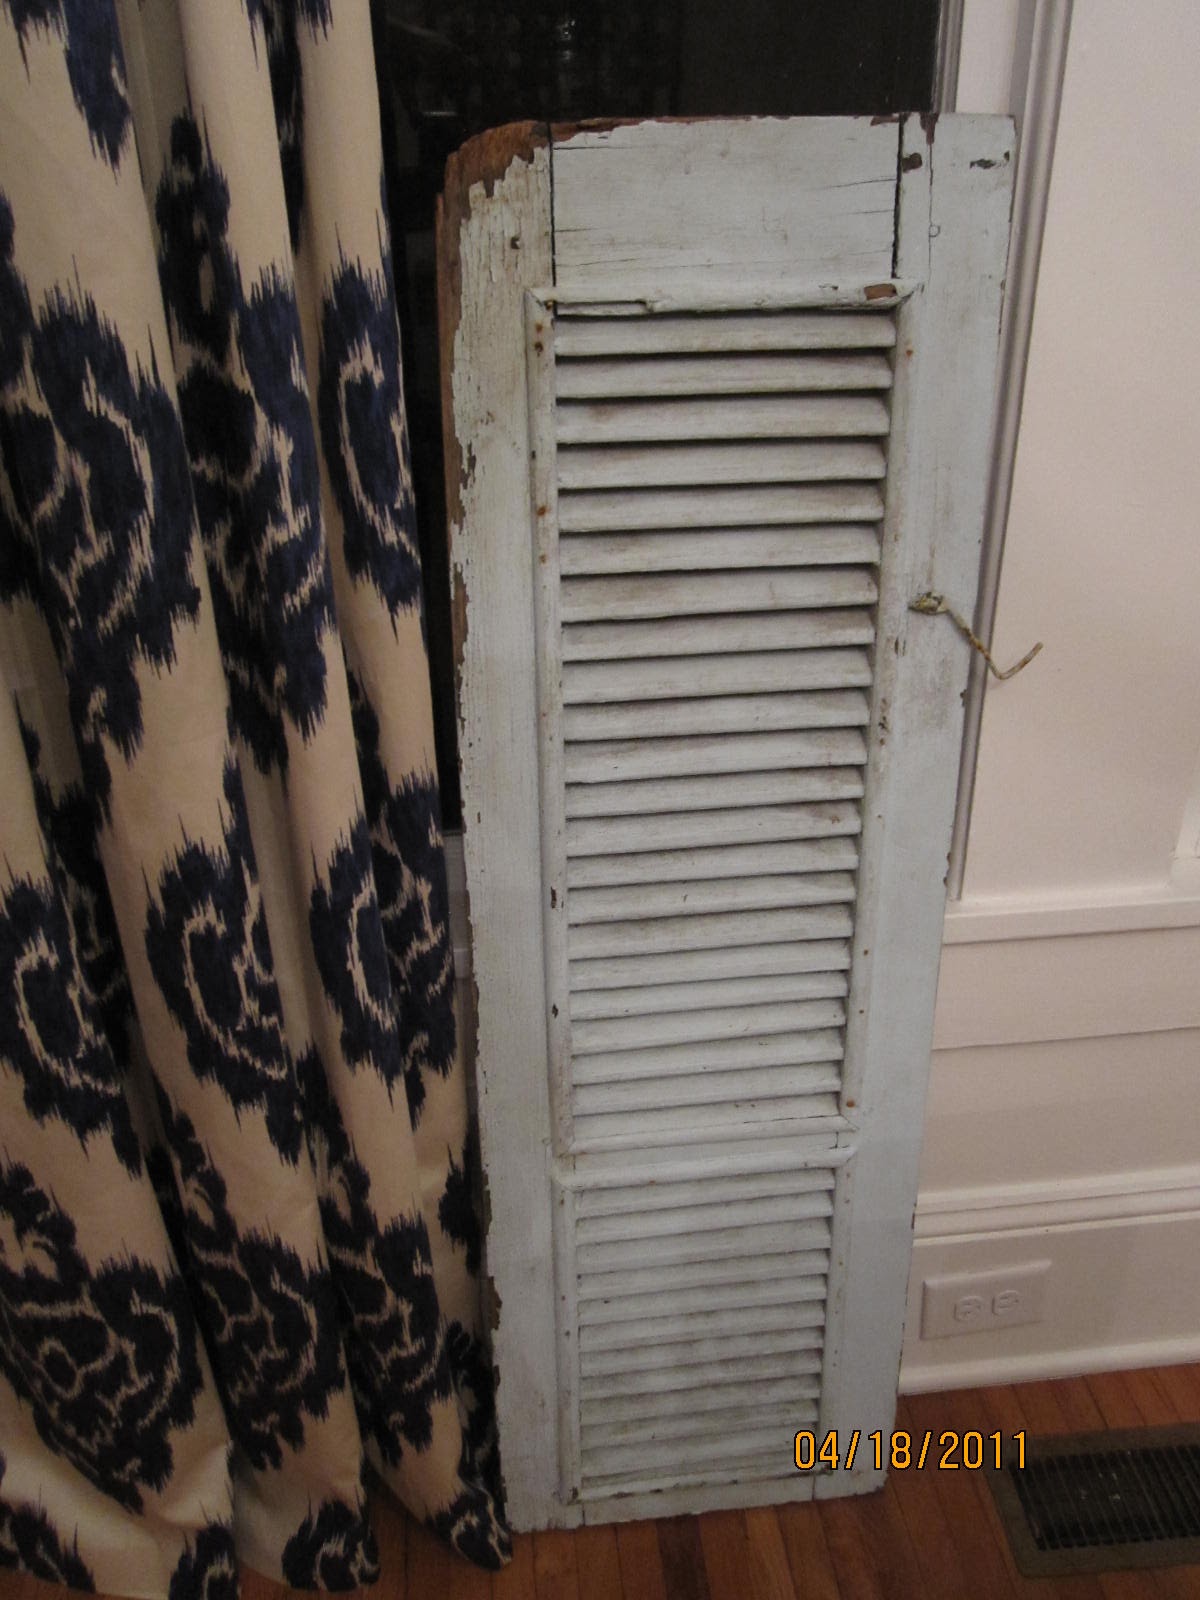
I've been wanting a place to hang coats and things by my front door for a while.  When I found this old shutter at one of my favorite places to shop, the Gibson Mill Depot in Concord, the light bulb went off...  Why not add hooks and turn it into my own cottage style coat rack?


Don't you just love the rustic edge and chippy blue paint? I can't seem to get enough of that look!


This turned out to be one of the easiest projects ever once I figured out what hooks to buy.  The piece itself was so unique and pretty in itself, I opted for some simple silver hooks from Home Depot.  I think they contrast nice with the shabby look of the shutter.  Only trick is that I had to get different screws, because the ones that came with the hooks were meant to go into a wall, and were too long. 


Once I had the supplies, I just made some quick measurements to make sure my hooks were spaced evenly, and drilled them in.  Then I added a couple d-hooks to the back of the shutter for hanging.  And here is the final outcome - functional and fabulous :)


Sunday, May 1, 2011

April Craft Party {Fun with Moss}

For April, we gathered at Christina's house in Plaza Midwood and had some fun with moss, making topiaries and wreaths....


I created a couple mossy goodies... First, a wreath for my door.  I think it turned out kinda fun, but now that I see it in this pic, it needs more bright green on the left side (one more thing for my to-do list!).


Second, a little moss ball vignette. I couldnt decide where to put this.  I tried several places and liked it by this lamp at first, but felt it was too hard to appreciate all the pretty texture of them from so far away...


In the end, the coffee table in the screened in porch was the perfect spot.  It really tied in with the green color scheme and nature theme going on in there.  What do you think?


For some ideas, inspiration, and instructions, check out these great posts Christina shared with us: