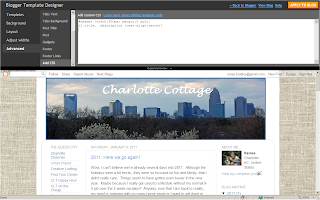
The background is the most noticeable change, but that is pretty simple to change. There are so many good sites out there to find free blog backgrounds and they all provide easy instructions. The linen one I am currently using is from the Background Fairy, you can find it here.
Other than the background, there are a couple other small tweaks that took me a little research to figure out - The header is now centered and has new font. Both of these changes are not currently available as simple options to set within the blog designer. So, here is how I was able to do it....
(1) Centering your Title
Go to the Template Designer and Select Advanced --> Add CSS
Then simply copy and paste the following text:
#header {width:586px; margin:0 auto}
h1.title, .description {text-align:center}
h1.title, .description {text-align:center}
The red number above can be changed depending on how you want your picture to look. For mine, I used a width of 900px because I wanted to have my picture stretch all the way across the top. When you enter the CSS text and play around with the width, you should see the preview screen changing accordingly. So just keep playing with it until it looks how you want.
Once you have it looking how you would like, just hit "Apply to Blog".
(2) Changing Font
Most blogspot templates are pretty limited on the fonts available, so the only way I could figure out how to change it to something more unique was to edit the html itself.
First, I had to play around with some different fonts to decide what I wanted. So I just used Word to see what "Charlotte Cottage" would look like in some of the standard fonts available.
I decided to go with the fourth one down, Lucida Handwriting.
Next, go to the Design tab within your blogger pages, and click on the Edit HTML link.
Then, look for the .Header h1 tag within the code (you can do a Ctrl+F to search through the code until you find this spot). It should look very similar to the code shown below. Then, just add the line in red with the font of your choice - "font-family: your font".
.Header h1 {
font: $(header.font);
text-shadow: 1px 1px 3px rgba(0, 0, 0, 0.3);
font-family: lucida handwriting;
}
Just use the "Preview" button to check out your changes and when you are ready, hit "Save Template".
----
My next goal is to update the image on my header to have multiple photos like so many other great blogs do - Cottage and Vine, Whisperwood Cottage, Beach Cottage. See what I mean, so pretty! Before I can get that right, I probably need to learn how to take better pictures. Centsational Girl has some great tips for that here. Good Luck!


Wow! Thanks for the shout out! Also, thanks for the tips. Fonts always give me a time.
ReplyDelete-Rene
I am glad these posts hang around. I am looking forward to dressing things up come fall. And I am so very NOT tech savvy. I need a lot of advice.
ReplyDelete